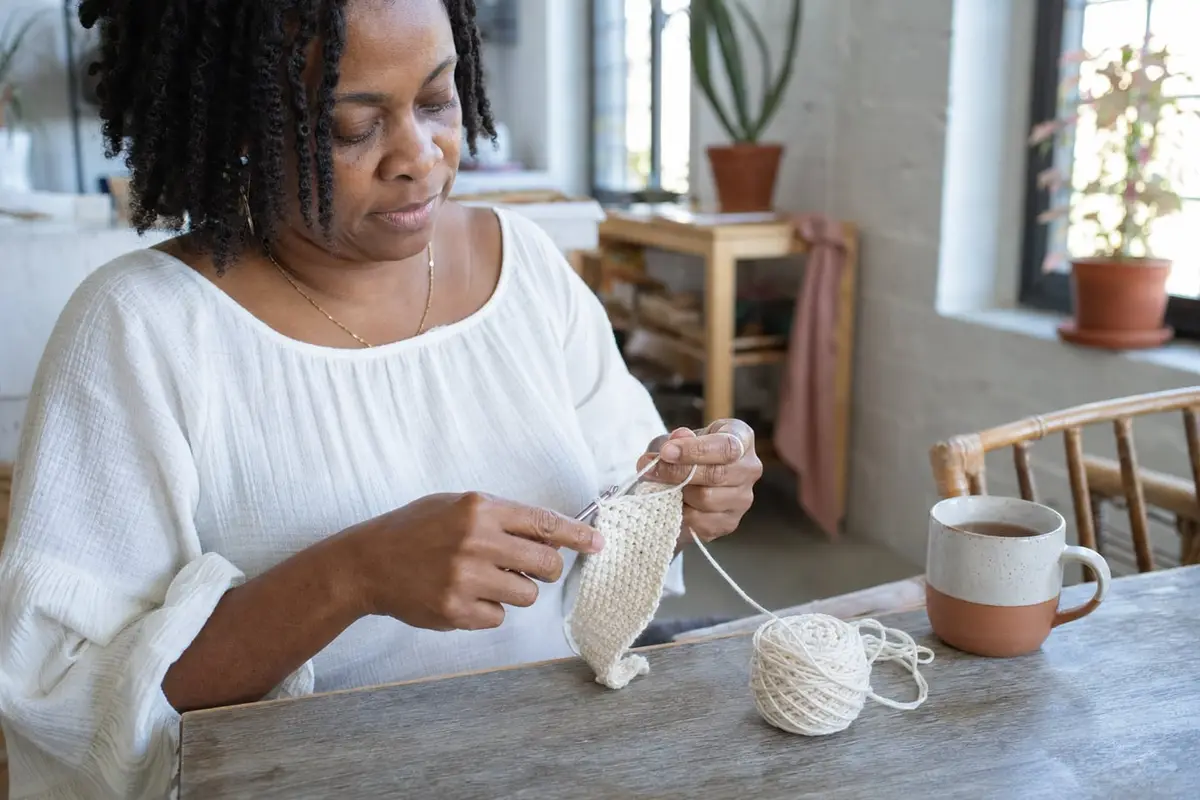
Following the Craft Yarn Council's 2018 guidelines, start with medium (4) yarn and a 5.5 to 6.5 mm hook. Make a slip knot, crochet a loose foundation chain, then work single crochet into the second chain from the hook: insert the hook, yarn over, pull up a loop, yarn over and pull through both loops. Chain one, turn and repeat.
Crochet — Crochet is a way of making fabric from yarn with a single hooked tool, by pulling loops of yarn through other loops one stitch at a time, so that only one loop remains on the hook when each stitch is finished.
Some links on this page are affiliate links: if you buy through them, we may earn a commission at no extra cost to you. It never changes our rankings. As an Amazon Associate I earn from qualifying purchases. Affiliate policy
Crochet uses one hook and one active loop at a time, which makes it one of the friendliest yarn crafts to learn on your own. In the Craft Yarn Council’s 2014 survey of 3,178 knitters and crocheters, nearly half said crochet was their main craft. This guide takes you from an empty hook to a small, finished square of single crochet, the foundation of almost every pattern you will meet later.
At a glance
| What | Recommendation for a beginner | Source |
|---|---|---|
| Yarn | Medium (4): worsted, afghan or Aran; smooth, light, solid color | Craft Yarn Council (2018) |
| Hook | 5.5 to 6.5 mm (I-9 to K-10½); an H-8 (5 mm) is also common | Craft Yarn Council (2018); Moogly (2025) |
| Gauge guideline | 11 to 14 single crochet per 4 inches with medium yarn | Craft Yarn Council (2018) |
| First stitches | chain (ch), then single crochet (sc, UK double crochet) | Craft Yarn Council (2018) |
| Turning chains | ch 1 for sc, ch 2 for hdc, ch 3 for dc | Moogly (2018) |
| Other tools | yarn needle with a large eye, small scissors | Craft Yarn Council |
We use US crochet terms throughout. If you learned from a British book or a pattern written in UK terms, the stitch names differ: see the note near the end.
What you need to start
You only need three things, plus a fourth to finish neatly:
- A medium weight yarn. Look for the number 4 in the yarn symbol on the label, which the Craft Yarn Council’s Standard Yarn Weight System uses for worsted, afghan and Aran yarns. Choose a smooth yarn, without fluff or texture, in a light, solid color: you need to see each loop clearly. Cotton and acrylic are both fine; very dark yarns and fuzzy yarns hide your stitches.
- A crochet hook that matches it. The label usually suggests a hook size. For medium weight yarn the Craft Yarn Council recommends 5.5 to 6.5 mm (US I-9 to K-10½), and many beginner lessons use an H-8 (5 mm) or an I-9 (5.5 mm). Letter sizes can differ slightly from one brand to another, so the size in millimeters is the reliable one.
- Small scissors to cut the yarn.
- A yarn needle (also called a tapestry needle), with a large eye and a blunt tip, to weave in the ends when you finish.
Nothing else is required to learn. Stitch markers and a row counter help later, and our guide to the best crochet books for beginners lists references worth keeping next to you.
Step 1: Hold the hook and the yarn
There are two common ways to hold a crochet hook. In the pencil grip, you hold the hook like a pen, between thumb and index finger, with the shaft resting on the side of your middle finger. In the knife grip, your hand goes over the hook, the way you hold a table knife to cut. Neither is more correct; pick the one that feels natural and keep it, because switching changes your tension.
Your other hand holds the work and controls the yarn coming from the ball. Most crocheters wrap the working yarn around their little finger, then over the index finger, and lift that finger slightly so the yarn stays taut between the ball and the hook. Your thumb and middle finger pinch the piece just below the hook. This hand is what sets your tension, which Sigoni Macaroni describes as the stress you apply to the yarn as you use it. Even tension, not speed, is the first skill to build.
Step 2: Make a slip knot
Every piece starts with a slip knot on the hook:
- Make a loop with the yarn, crossing the working yarn (the end attached to the ball) over the tail.
- Reach through the loop, catch the working yarn and pull a new loop through.
- Put that loop on the hook and pull both ends gently to snug it around the shaft. It should slide, not grip.
The slip knot does not count as a stitch, as Lion Brand’s first lesson points out. Leave a tail of about 6 inches; you will weave it in at the end.
Step 3: Crochet a foundation chain
The chain is the base row most flat pieces are built on.
- Hold the slip knot between thumb and middle finger of your yarn hand.
- Yarn over: bring the working yarn over the hook from back to front.
- Pull the hook, with the yarn caught in its throat, through the loop already on the hook. That is one chain.
- Repeat until you have the number of chains you need, moving your fingers up the chain every few stitches so you always hold it close to the hook.
For a first practice square, chain 16. Count the V shapes on the front of the chain, not the loop on the hook or the slip knot.
The most common beginner mistake happens here: chaining too tightly. Training materials developed for the Craft Yarn Council’s instructors program tell teachers to stress chaining loosely, and to suggest a hook one or two sizes larger for the foundation chain. If your chain curls or you struggle to fit the hook into it, start again with a looser hand or a bigger hook.
Step 4: Work your first row of single crochet
Single crochet, abbreviated sc, is the shortest of the common stitches and the easiest to count. For the first row, you skip the chain closest to the hook and work into the second one:
- Insert the hook into the second chain from the hook.
- Yarn over and pull up a loop through the chain. You now have two loops on the hook.
- Yarn over again and pull through both loops. One loop remains: one single crochet is done.
- Work one single crochet into each remaining chain.
With 16 chains you end the row with 15 single crochets, because the skipped chain gives the row its height. Clover’s single crochet tutorial follows the same logic: 11 chains for a row of 10 stitches. Count your stitches at the end of the row; it is the habit that prevents most problems later.
Step 5: Turn and work the next rows
At the end of the row:
- Chain 1. This turning chain brings your hook up to the height of the next row of single crochet.
- Turn the work so the back faces you, keeping the hook in place.
- Work one single crochet into each stitch of the previous row, inserting the hook under both loops at the top of each stitch. Skip the turning chain itself.
Repeat until the piece is roughly square, about 15 rows. Taller stitches use taller turning chains: usually 2 chains for half double crochet and 3 for double crochet. Whether a turning chain counts as a stitch varies from one designer to another, so follow what the pattern says. Our page on basic crochet stitches explains each stitch and its turning chain.
Step 6: Fasten off and weave in the ends
When the last row is done:
- Cut the yarn, leaving a tail of about 6 inches.
- Yarn over and pull the tail all the way through the loop on the hook, then tighten. This is called fastening off.
- Thread each tail onto the yarn needle and weave it back and forth through the stitches on the wrong side for an inch or two before trimming it. Changing direction once or twice keeps it from working loose.
You have made your first piece of crochet fabric.
Understanding tension and gauge
Tension is how firmly you hold the yarn; gauge is the result, the number of stitches and rows in a given width, usually 4 inches. The Craft Yarn Council’s guideline for medium weight yarn is about 11 to 14 single crochet stitches per 4 inches. As Sigoni Macaroni explains, a piece that comes out larger than intended points to loose tension, and a smaller one points to tight tension.
For a practice square, gauge does not matter. It starts to matter when a project must fit, like a hat or a garment: the pattern then states a gauge, and you change hook size until your swatch matches it, a smaller hook if your swatch is too big, a larger one if it is too small.
Rows or rounds: the two ways to build crochet
Everything above is worked in rows: you go across, turn, and come back. Blankets, scarves and dishcloths are made this way.
The other way is in the round: you start from a small center and work outward in circles. Hats, bags, coasters and amigurumi toys begin like this, usually with a magic ring that closes the center completely. Rounds can be joined with a slip stitch at the end of each round, or worked as a continuous spiral, which Vogue Knitting notes is usually done in single or half double crochet.
Learn rows first. Working in the round is easier once you can recognize the top of a stitch.
US or UK terms: check before you start
American and British patterns use the same names for different stitches. A US single crochet is called a double crochet in the UK, and a US double crochet is a UK treble. Before you start a pattern, check which system it follows: a pattern that never mentions “single crochet” is almost certainly written in UK terms. Our page on how to read a crochet pattern explains abbreviations, brackets and stitch counts.
Common first-day problems
- The piece gets narrower or wider. You are skipping the last stitch of a row or working twice into the first one. Count stitches at the end of every row, and put a stitch marker in the first and last stitch if you lose track.
- The edges are wavy or slanted. Often the turning chain is being worked into, or the last stitch is hidden under it. Look for the top of the last stitch and work into it.
- It is hard to insert the hook. Your tension is tight. Relax your yarn hand, or move up one hook size.
- The yarn splits. You may be catching only part of the strand; try a hook with a rounder head, or a smoother yarn.
Where to go next
If you want the stitch explained in more depth, including why its turning chain is one chain and how to avoid losing stitches at the edges, see our page on the single crochet stitch. Once a square of single crochet looks even, learn the half double crochet and the double crochet stitch, which build fabric faster, and then the magic ring for work in the round. When you are ready for a real project, our guide to choosing your first crochet project helps you pick one you will finish, and our beginner books comparison suggests references to keep at hand.
Key facts
- For Medium (4) yarn, which covers worsted, afghan and Aran, the Craft Yarn Council's 2018 Standard Yarn Weight System recommends a 5.5 to 6.5 mm crochet hook (US I-9 to K-10½) and a gauge of 11 to 14 single crochet stitches per 4 inches.Craft Yarn Council, Standards & Guidelines for Crochet and Knitting, 2018
- In the Craft Yarn Council's 2014 tracking study of 3,178 US knitters and crocheters, 48% said they primarily crochet, 32% primarily knit and 20% do both equally.Craft Yarn Council, 2014 tracking study (press release, 2015), 2015
- Lion Brand's first crochet lesson, updated in 2023, points out that the slip knot does not count as a stitch and that only one loop should remain on the hook at the end of each stitch.Lion Brand, Learn to Crochet Lesson 1 (Liza Eckert), 2023
- Moogly's beginner course, updated in 2025, recommends a light-colored DK, worsted or Aran yarn (weight 3 or 4) with a US H-8 (5 mm) or I-9 (5.5 mm) hook for learning.Moogly, Learn How to Crochet (Tamara Kelly), 2025
FAQ
Can I teach myself to crochet?
Yes. Crochet only needs a hook, yarn and a few repeated movements, and free written and video lessons from yarn brands and designers cover every step. Most self-taught beginners start with the chain and single crochet, practice a small square in rows, and add new stitches once their tension is even.
What is the first stitch to learn in crochet?
Start with the chain, which forms the foundation of most projects, then single crochet, the shortest of the common stitches and the easiest to see and count. Half double crochet and double crochet use the same movements with one or two extra steps.
What size hook and yarn should a beginner use?
A smooth, light-colored medium weight (4) yarn shows stitches clearly. The Craft Yarn Council recommends a 5.5 to 6.5 mm hook (I-9 to K-10½) for that weight, and many beginner lessons use an H-8 (5 mm) or I-9 (5.5 mm) hook. Always check the size printed on the yarn label.
Why is my foundation chain so tight?
Beginners tend to pull the chain tight, which makes the first row hard to work and can make the bottom edge narrower than the rest. Chain more loosely, or work the chain with a hook one or two sizes larger than the one used for the rest of the project.
Sources
- Craft Yarn Council: Standards & Guidelines for Crochet and Knitting (PDF, 2018)
- Crochet Guild of America: Objectives for Beginner Crochet Classes
- Craft Yarn Council: Standard Yarn Weight System
- Craft Yarn Council: Learn Single Crochet
- Craft Yarn Council: Hooks and Needles
- Lion Brand: Learn to Crochet, Lesson 1: Chain and Single Crochet
- Clover USA: How to Do the Single Crochet Stitch (Ashley Parker)
- Sigoni Macaroni: How to Hold Your Yarn and Control Tension
- Moogly: Learn How to Crochet
- Vogue Knitting: Crocheting Circles
Related reading
- Basic Crochet Stitches: Chain, Single, Half Double and Double
- Magic Ring Crochet: How to Make an Adjustable Ring, Step by Step
- Single Crochet Stitch: How to Single Crochet for Beginners
- Double Crochet Stitch: Steps, Turning Chain and Common Mistakes
- How to Read a Crochet Pattern: Abbreviations, Repeats and Counts
- Crochet Books for Beginners: 5 Picks by What They Teach